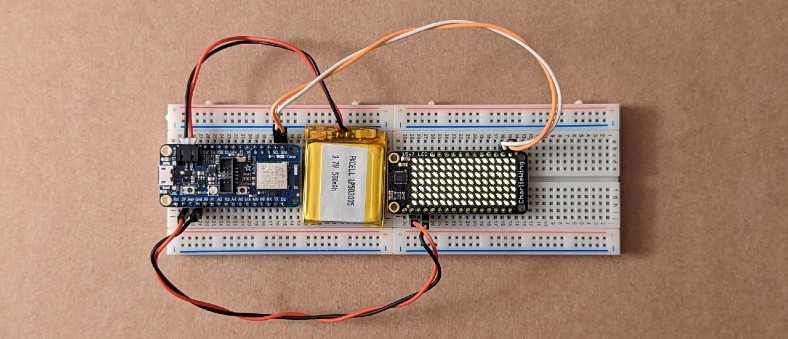
A reimplementation of the TinyGo drivers package for communicating with multiples of the same (supported) devices on one individual I2C bus.

tinygo-multi-i2c

Go Reference go reportcard A reimplementation of the TinyGo drivers package for communicating with multiples of the same (supported) devices on one individual I2C bus.

Supported Devices

  • ADXL345 - I2C Accelerometor by iMEMS
  • AMG88XX series - I2C High Precision Infrared Array Sensor by Panasonic
  • BH1750 - I2C Light Sensor by SMAKN
  • BLINKM: I2C-controllable LEDs
  • BME280 - I2C Humidity and Pressure Sensor by Bosch Sensortec
  • BMP280 - I2C Barometric Pressure Sensor by Bosch Sensortec
  • LIS3DH - I2C Acclerometer by STMicroelectronics
  • MPU6050 - I2C (Gyro + Acclerometer) MEMS Motion Tracking Device by InvenSense/TDK

Pre-requisites

  • you must have Go installed (recommended v1.17+, for Windows 10, you MUST use Go v1.16 or greater)
  • you must have TinyGo installed (quick install guides found here) and configured for the IDE you are using (guides for both VSCode, IntelliJ IDEA, and other IDEs found here)

Why was tinygo-multi-i2c built?

tinygo-multi-2c was built for the purpose of simplifying the process of setting up multiples of one or more devices that communicate over the same I2C bus using the I2c protocol and pre-written drivers from TinyGo (found here).

What problem does tinygo-multi-i2c solve?

While using the pre-written drivers from TinyGo is extremely useful, it takes a handful of lines to set up one device. And that's only if you're using the default address that specifc device uses. Whereas using the tinygo-multi-i2c package, you can create a device, configure it, set the address specifically to the one you want, and test the connection for that device all in as little as two lines after initializing the your I2C bus, allowing for cleaner, more concise code. Initializing the I2C bus; which will be the same as doing so with the drivers package from TinyGo (an example of can be found on TinyGo's page for Divers here; there's also an example down below). The error returned, if nil isn't returned, will help point you in the direction of where your device set-up is failing to allow for smooth debugging.

How do I use tinygo-multi-i2c?

After installing the pre-requisites and configuring your IDE, simply import tinygo-multi-i2c using go get

$ go get github.com/syke99/tinygo-multi-i2c

Then you can import the package in any go file you'd like

import (
    "machine"

     multi "github.com/syke99/go-c2dmc"
)

Basic usage

Initialize your I2C bus by initializing and configuring an machine.I2C0 to be passed into the NewDevice() method. Ex:

    i2c := machine.I2C0
    err := i2c.Configure(machine.I2CConfig{
        SCL: machine.P0_30, // <-- These values will be dependent on what microcontroller you're using
        SDA: machine.P0_31, // <-- These values will be dependent on what microcontroller you're using
    })
    if err != nil {
        println("could not configure I2C:", err)
        return
    }

Declare a variable to hold the returned Devices struct that will be used to access the device you create, and then call multi.NewDevices(params) and pass in your parameters, the first being the i2c bus you initialized, followed by the name of the device you would like to create in all lowercase (minus the first letter). Ex:

// since this isn't a BMP280, we need to just pass in a slice of uint's that are all 0
// it can also be reused for any other I2C device that you're using that isn't a BMP280
// a BMP280 needs 5 uint's passed to it for its Standby, Filter, Temperature, Pressure, and Mode.
b := [5]uint{0,0,0,0,0}

// the default address for a BLINKM is 0x09, so to dynamically set it, we pass in the address, 
// i.e.: 0x00 in this example
// if you want to use the default address of 0x09, you can just pass in a 0 as the address
devices, error := multi.NewDevice(i2c, "blinkm", 0x00, b)

NOTE: if you are setting up a BMP280 device, you must provide 5 arguments (of type uint) to the NewDevice method to configure the BMP280's Standby, Filter, Temperature, Pressure, and Mode. If not, simply pass in all 0's. This example just uses all 0's with a BMP280 for brevity's sake.

After that, grab the device you created and save it in a variable by using dot notation with the Devices struct you got returned. Ex:

b := devices.Blinkm

Then you can simply just call the function that corresponds to how you want to interact with the device. Ex:

error := b.FadeToRGB()

This process can be repeated by simply repeating the line to create a new device, just with a new name of a variable to hold the Devices struct for each device you wish to create. Ex:

// These devices are using the default addresses, 
// so passing in 0, and using the []uint named b we initialized 
// above since none of them are a BMP280

// Device 1, a BLINKM RGB light
d1, error := multi.NewDevice(i2c, "blinkm", 0, b)
// Handle or ignore error (advised to not ignore)
bl := d1.Blinkm

// Device 2, an MPU6050 motion tracking device
d2, error := multi.NewDevice(i2c, "mpu6050", 0, b)
// Handle or ignore error (advised to not ignore)
m := d2.Mpu6050

// Device 3, a BH1750 light sensor
d3, error := multi.NewDevice(i2c, "bh1750", 0, b)
// Handle or ignore error (advised to not ignore)
bh := d3.Bh1750

error := bl.FadeToRGB()
// handle error and/or using pressure reading value here

acceleration, error := m.ReadAcceleration()
// handle error and/or using acceleration reading value here

illuminance, error := bh.Illuminance()
// handle error and/or using illuminance reading value here

Note Due to these drivers requiring an I2C bus that is set up outside of this package (utilizing the machine package that TinyGo uses and you must have configured your IDE to be able to use), adding tests to this package is beyond its scope (due to not having direct access to the machine package coupled with the fact the machine package is dependent on the microcontroller your program(s) will be running on).

Owner
Quinn Millican
An enthusiastic Gopher
Quinn Millican
Similar Resources

Build for all Go-supported platforms by default, disable those which you don't want.

bagop Build for all Go-supported platforms by default, disable those which you don't want. Overview bagop is a simple build tool for Go which tries to

Jul 29, 2022

A ocilloscope writen in GO. Supported serial input, portaudio input.

A ocilloscope writen in GO. Supported serial input, portaudio input.

Oct 23, 2021

An ease to use finit state machine golang implementation.Turn any struct to a fsm with graphviz visualization supported.

go-fsm An ease to use finit state machine golang implementation.Turn any struct to a fsm with graphviz visualization supported. usage import github.co

Dec 26, 2021

Quickly clone an entire org/users repositories into one directory - Supports GitHub, GitLab, Bitbucket, and more

Quickly clone an entire org/users repositories into one directory - Supports GitHub, GitLab, Bitbucket, and more

ghorg ghorg allows you to quickly clone all of an orgs, or users repos into a single directory. This can be useful in many situations including Search

Jan 1, 2023

safe and easy casting from one type to another in Go

cast Easy and safe casting from one type to another in Go Don’t Panic! ... Cast What is Cast? Cast is a library to convert between different go types

Jan 7, 2023

Squizit is a simple tool, that aim to help you get the grade you want, not the one you have learnt for.

Squizit is a simple tool, that aim to help you get the grade you want, not the one you have learnt for.

Squizit is a simple tool, that aim to help you get the grade you want, not the one you have learnt for. Screenshots First, input PIN Then enjoy! Hoste

Mar 11, 2022

Go implementation Welford’s method for one-pass variance computation

Variance and standard deviation caluculation using variance's algorithm Table of Contents Introduction Installation Usage Contributing License Introdu

Jun 5, 2022

Run The World. Command aggregator output. Define many services watch them in one place.

Run The World. Command aggregator output. Define many services watch them in one place.

Feb 2, 2022

K3ai Executor is the runner pod to execute the "one-click" pipelines

K3ai Executor is the runner pod to execute the

Welcome to K3ai Project K3ai is a lightweight tool to get an AI Infrastructure Stack up in minutes not days. NOTE on the K3ai origins Original K3ai Pr

Nov 11, 2021
Comments
  • Determine final list of supported devices

    Determine final list of supported devices

    A handful of devices remain to be determined if support will be added or not. A final list of supported devices should be compiled and remaining unsupported devices removed from codebase. Refactoring into device-specific files will make this task much simpler, so complete and close that issue before beginning this one.

  • Refactor

    Refactor

    Once the final functions are ported over, refactor deviceConfigurers.go, deviceConnectors.go, deviceCreators.go, and deviceMethods.go into device-specific files for a cleaner codebase

  • Make Sure All Supported Devices Allow Multi-Address Use

    Make Sure All Supported Devices Allow Multi-Address Use

    RESEARCH TASK

    Not all I2C devices provide the option of using them on different addresses. Some only use one specific address, and therefore cannot be supported.

    This being the case, research needs to be done to make sure all supported devices support the use of different addresses, lest they be deprecated and removed from the package.

This project is an implementation of Fermat's factorization method in which multiples of prime numbers are factored into their constituent primes

This project is an implementation of Fermat's factorization method in which multiples of prime numbers are factored into their constituent primes. It is a vanity attempt to break RSA Encryption which relies on prime multiples for encryption.

Jun 3, 2022
A simple LCD controller package for raspberry pi liquid crystal I²C displays.

A simple LCD controller package for raspberry pi liquid crystal I²C displays.

Nov 1, 2022
Neko is a cross-platform open-source animated cursor-chasing cat. This is the reimplementation write in Go.

Neko Neko is a cat that chases the mouse cursor across the screen, an app written in the late 1980s and ported for many platforms. This code is a re-i

Nov 21, 2022
Sensirion SCD30 CO2 sensor i2c driver module for Golang

Sensirion SCD30 CO2 sensor i2c driver module for Golang Overview With this module Sensirion SCD30 CO2 sensor can be accessed throug i2c bus. Implement

Oct 9, 2022
A go driver for the adafruit I2C 7 Segment display

A go driver for the adafruit I2C 7 Segment display

Nov 21, 2021
Some plain Go/Golang i2c sensor bindings to Waveshare Sense HAT for raspberry pi

i2c some plain Go/Golang i2c sensor bindings to Waveshare Sense HAT for raspberry pi using https://periph.io Supported hardware: Raspberry Zero W 1 ht

Dec 31, 2021
TinyGo attitude estimation simulation applet.

tiny-ahrsim TinyGo attitude estimation simulation applet. Instructions Requirements Go installed (golang.org) git installed (git-scm.com) TinyGo insta

Oct 26, 2022
software keyboard for TinyGo

tinykb tinykb is a software keyboard for TinyGo. To use tinykb, it is necessary to implement the driver.Displayer interface. It is still an alpha vers

Jan 14, 2022
Go/TinyGo driver for Lumissil IS31FL3731 matrix LED driver

IS31FL3731 Go/TinyGo driver for Lumissil IS31FL3731 matrix LED driver. PR to include this driver to the official TinyGo driver list What's implemented

Feb 6, 2022
Native Go bindings for D-Bus

go.dbus go.dbus is a simple library that implements native Go client bindings for the D-Bus message bus system. Features Complete native implementatio

Nov 20, 2022